How I Machine Quilt Parallel Lines Without Marking
- Sally Terry
- Jun 27, 2019
- 4 min read
I have always had trouble knowing how to Machine Quilt perfect parallel lines on my home sewing machine, Bernina 1130, and my longarm as well without a great deal of marking.
The trick is where to focus one's eyes.
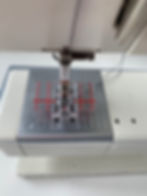
I use this great little parallel foot for creating multiple straight parallel lines by following a previously stitched line using the marks on the parallel foot by focusing on the red lines to guide my hands. You can follow line after line varying the widths as you go without marking.
You don't even need to switch out the foot since it is clear and you see while doing a blanket stitch applique as you can see in the Double Wedding Ring Quilt pictured below.
Plus, echo quilting is breeze and you can stitch most thread paths without marking using this foot.


Or you can stitch by simply guiding the foot along the edge of a piecing line, a previously stitched thread path or follow the applique as I did here without marking!
You truly can get finished with your project much quicker than you would think, because the you are not wasting time marking. The time you do take is in stitching and choosing the stitches...and that is the fun part.

The French Knot stitch follows the inside line of the fabric line and was simple to stitch using the Parallel Foot. I think I would use the French Knot stitch on every quilt if I could. The thread was Sulky Blue Green Variegated. Since this was a class sample it is still not completed...happily so :)
Notice the Serpentine Stitches and zig-zags of various widths. This is super fun to do because there is so little marking. And it amazes me how easy it is to follow a curve with this ingenious awesome little foot.

As you can see there are lines that let you stitch as far away as one inch. And if you shift your needle to the side you can add additional width. I have even used the edge of the basic foot shape as you will see in the video. The next red line mark I use most often is the half inch.
Remember to use both sides of the foot, saves for a lot of shifting of fabric. I have quilted a lot of Stripey Children's Charity Quilts using this foot and decorative stitches.
Ideas for using:
Echo Quilting
Parallel Line Quilting
Echo Quilting Curves
Around Large Applique
Dense Straight-line Quilting at Binding Edge
Curved Cross-Hatch
Straight-line Cross-Hatch
Background Machine Quilting Patterns like Railroad
You probably have a quilt right now waiting in the back of a closet or at the bottom of a tub for some fun thread and thread paths using this foot. Hmmmmmm?
This snap-on parallel foot works with the Universal Snap-on Fitting both the Bernina Old Style and New Style. Just make sure you get the right adapter for your Bernina Model.
The Old Style has two pins at the top and the New Style has a solid bar at the top.

I also learned it is important to know where to focus your eyes. This works for Traditional Sit Down Home Machine Quilters as you focus your eye where you want to go. For Longarm, use a template or ruler and line it up a 1/4" away and focus your eye where you want to go. This is important if you want to stitch to a certain point, seam, thread intersection by focusing on the edge of your foot and not on the needle.
Also, use this technique machine quilting on your longarm when you are using an expanded foot that can be switched out or slipped over your original foot to add a larger diameter so the stitches are farther apart and you are not quilting to cardboard! That just takes the joy out of it sometimes, don't you agree?
It really is a matter of where you are looking to guide the fabric or machine, focusing on the edge of the foot or extended foot, not on the needle.

Also be sure to try this technique with all those extra fancy decorative stitches that you already have on your home machine. You can cover more area in less time and echo quilt at various distances depending on the areas of your quilt top.
I have quilted 6 lines without marking...to me that is remarkably creative fun and the results are exciting and unique.
I have even used one decorative stitch on top of another for added detail. This is a technique I use with my students and the combinations are really exciting to see. I am sure you would have a great time playing with different combinations of thread colors and patterns.
Imagine a whole new look to your quilts and machine quilted projects like handbags, large ruler bags and more without a lot of marking on the floor or dining room table with multiple rulers and yard sticks.
There are other ways to parallel line quilt. There is a bar that slips behind the needle bar on home machines but you are limited I think to how accurate you can be.
This clever little parallel foot can be used with the feed dogs up or the feed dogs down--up for straight-line stitching and down for curves; although most of the machine quilting I did on the Double-Wedding Ring Applique Quilt was with the feed dogs up.
Remember it is not a race it is a marathon... :)
I truly hope this helps. Be daring, be spectacular and take advantage of all the tools and stitches available to you. We invest a lot in our machines and threads, get the most out your home machine by using the decorative stitches as you machine quilt.
Quilt Happy Always, Sally Terry


